How to connect Domain to inCart
1. Going to the website at your domain bought. ( Ex. GoDadday, Namecheap, Wix 0r Etc. )
2. Going to the menu DNS of the website (DNS / Manage DNS/ Advanced DNS)
How to setting ( DNS / Manage DNS / Advanced DNS ) of GoDaddy, Nameccheao, Wix or Etc.
https://www.godaddy.com/help/manage-dns-records-680
https://www.namecheap.com/knowledgebase/search/?q=manage%20dns&page=1
https://support.wix.com/en/article/adding-dns-records-in-your-wix-account
3. How to edit or add record value to connect to inCart (Following Text red Highlight for add value to setting DNS)
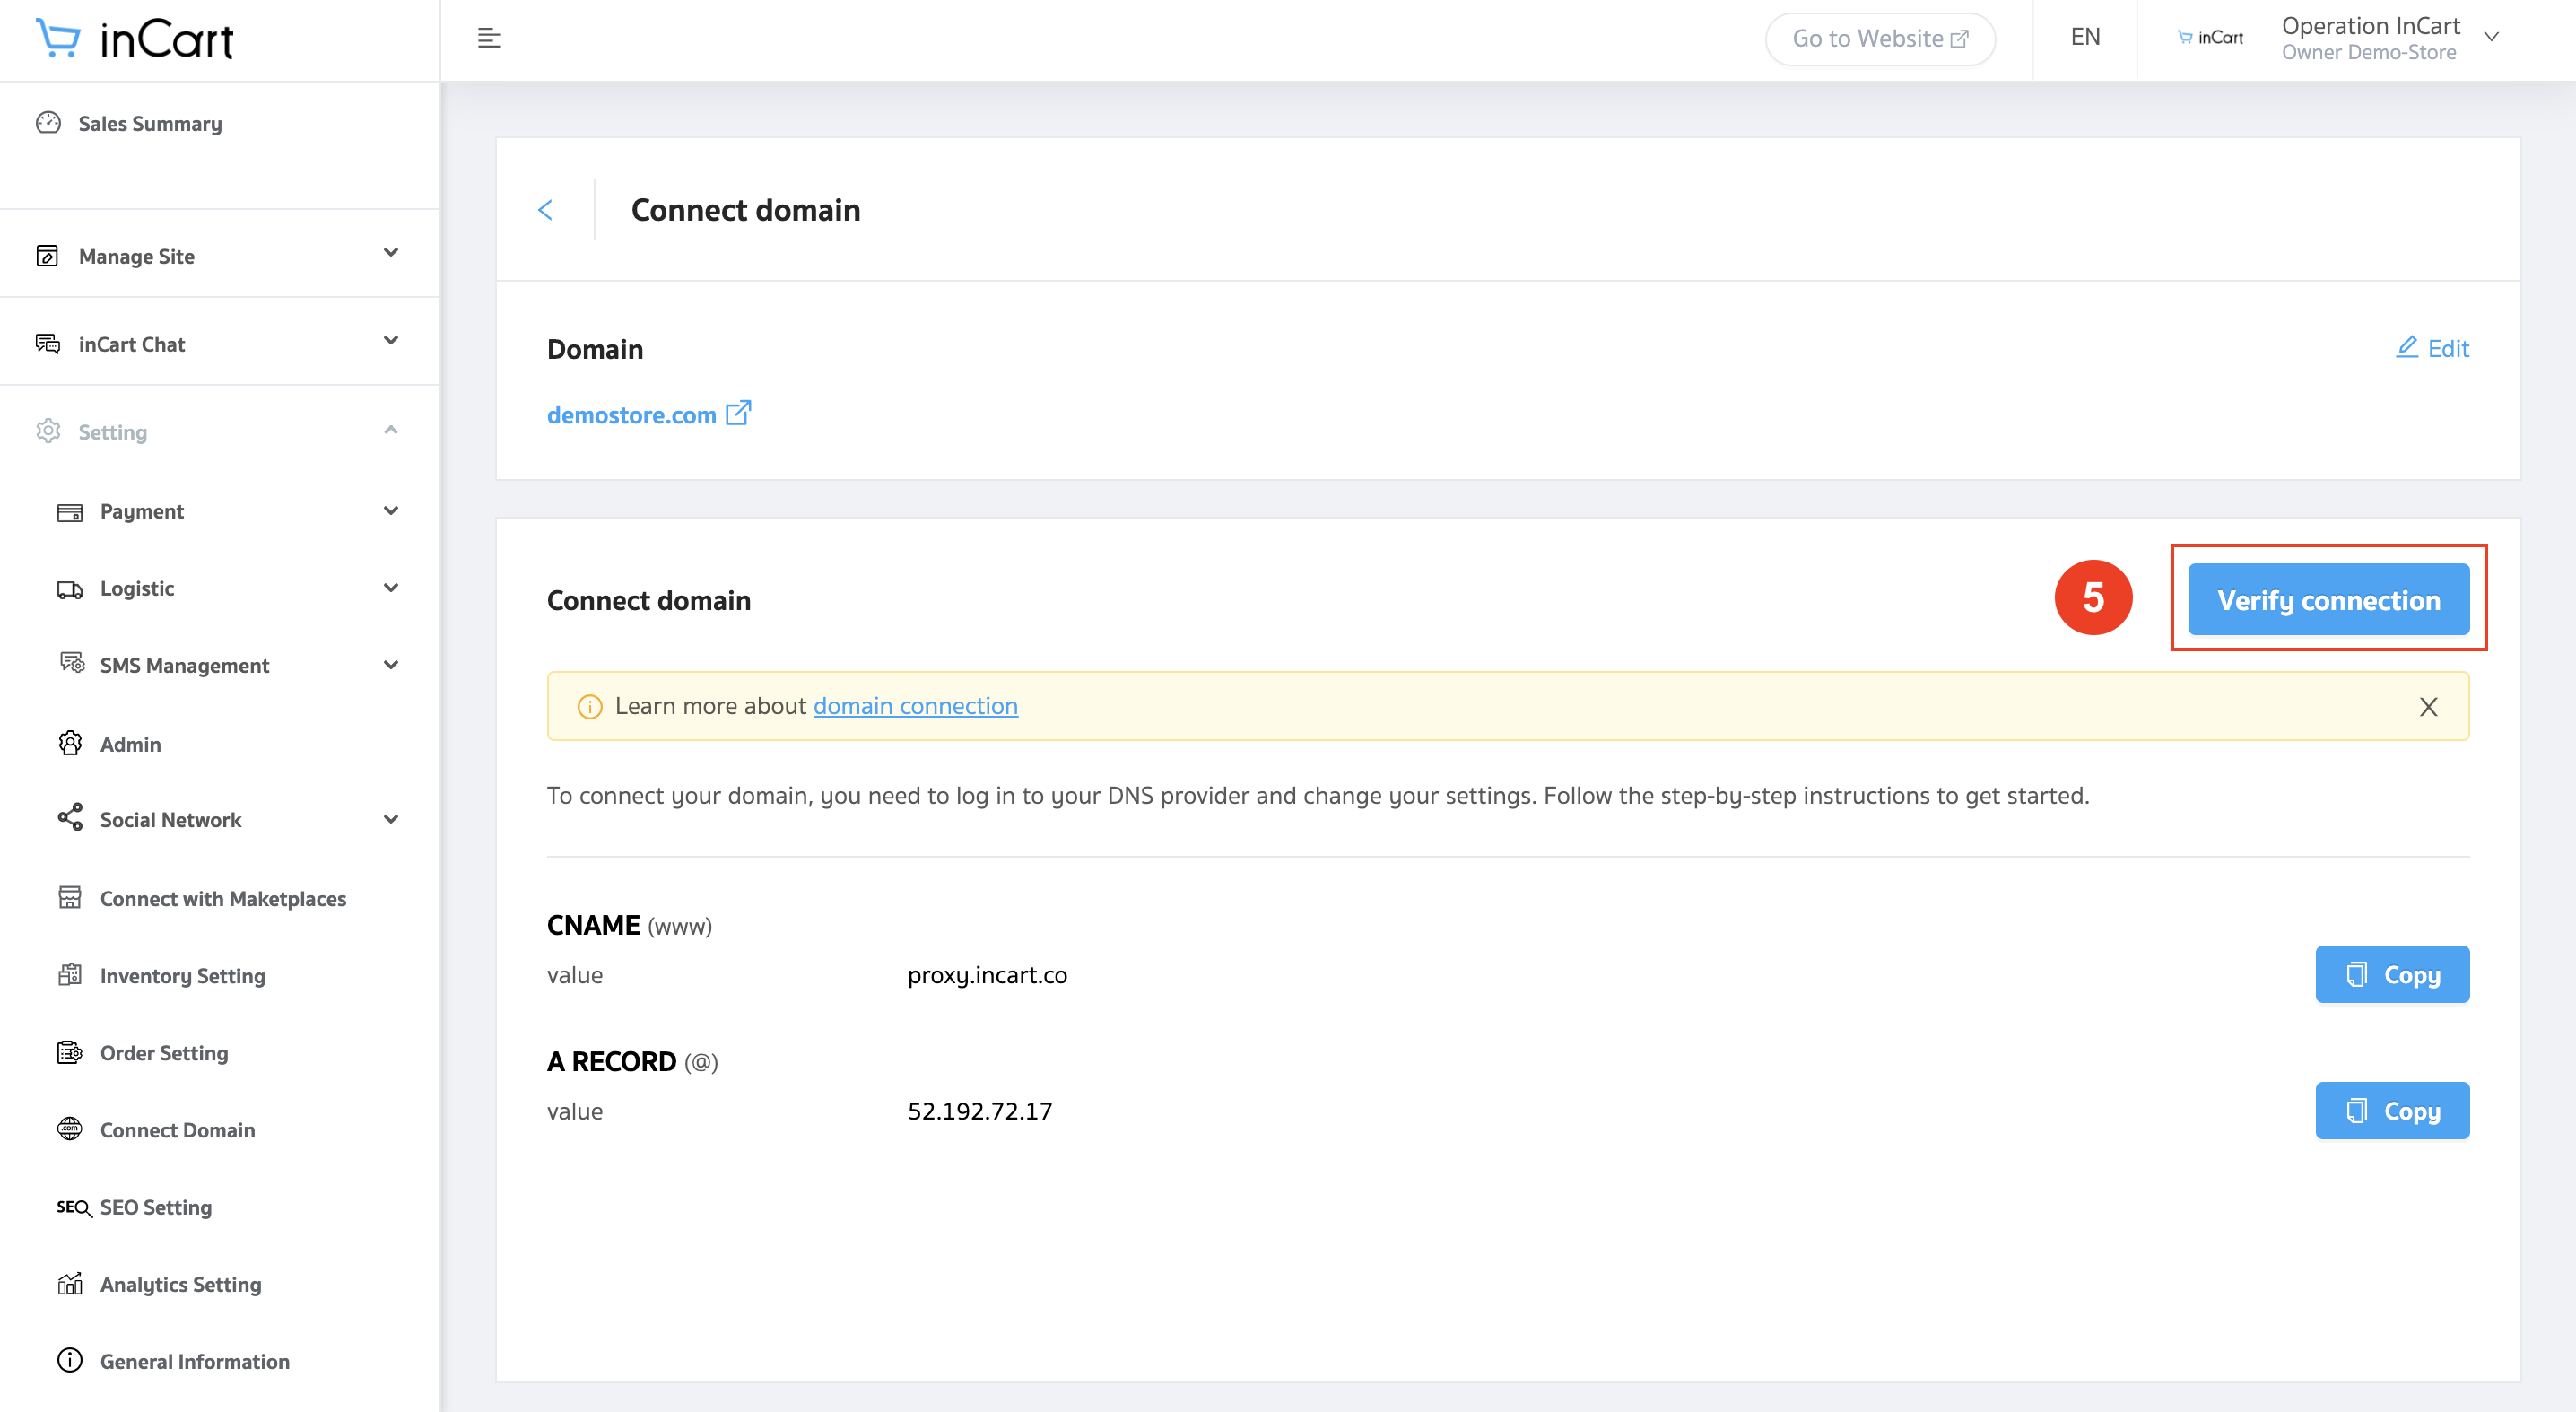
- 3.1 Add to – A Record
Type: A (A Record) - Host/Name: @
Value: 52.192.72.17 - 3.2 Add to CNAME Recotd
Type: CNAME (CNAME Record) - Host/Name: www
Value: proxy.incart.co
*Following in No.3.1 and 3.2 for connecting domain Name to inCart
4. Going to inCart Website
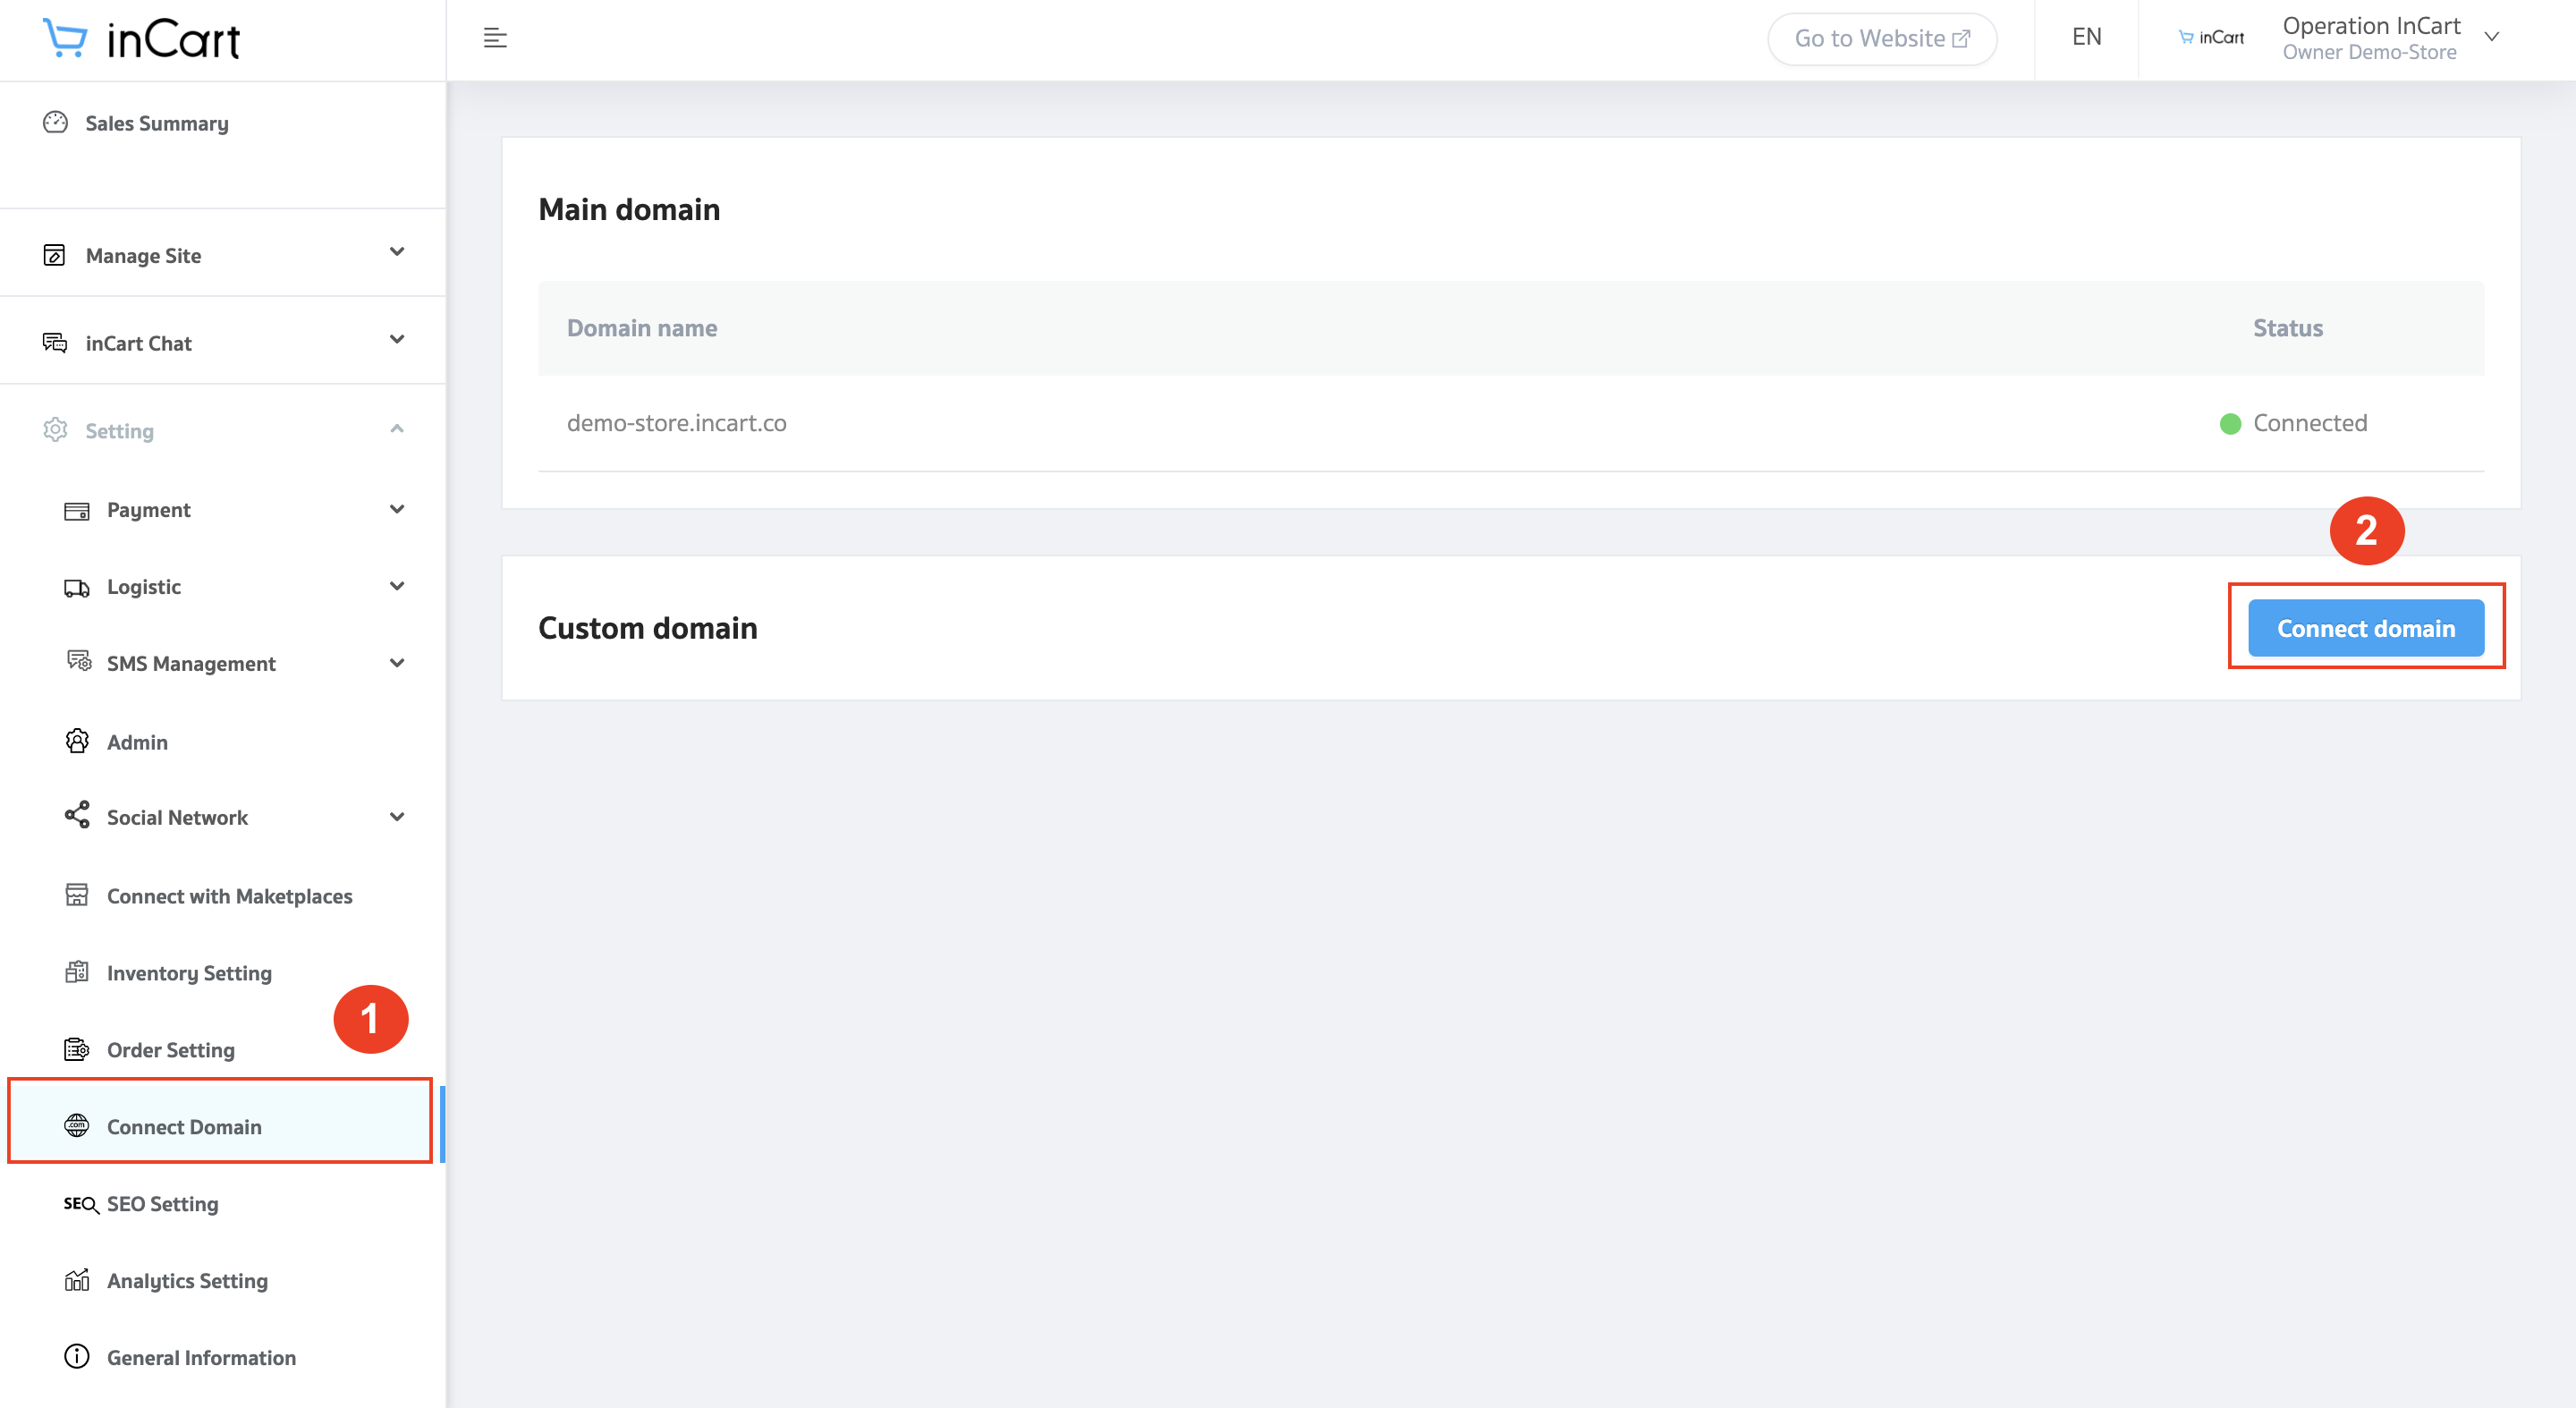
5. On the left menu setting > click (Connect Domain)
- 5.1 Choose > Connect Domain
- 5.2 Click Connect Domain button on the next page

6. Input your Domain Name (Not input WWW in front of your Domain Name such as demostore.com)
and then click > Continue Button.

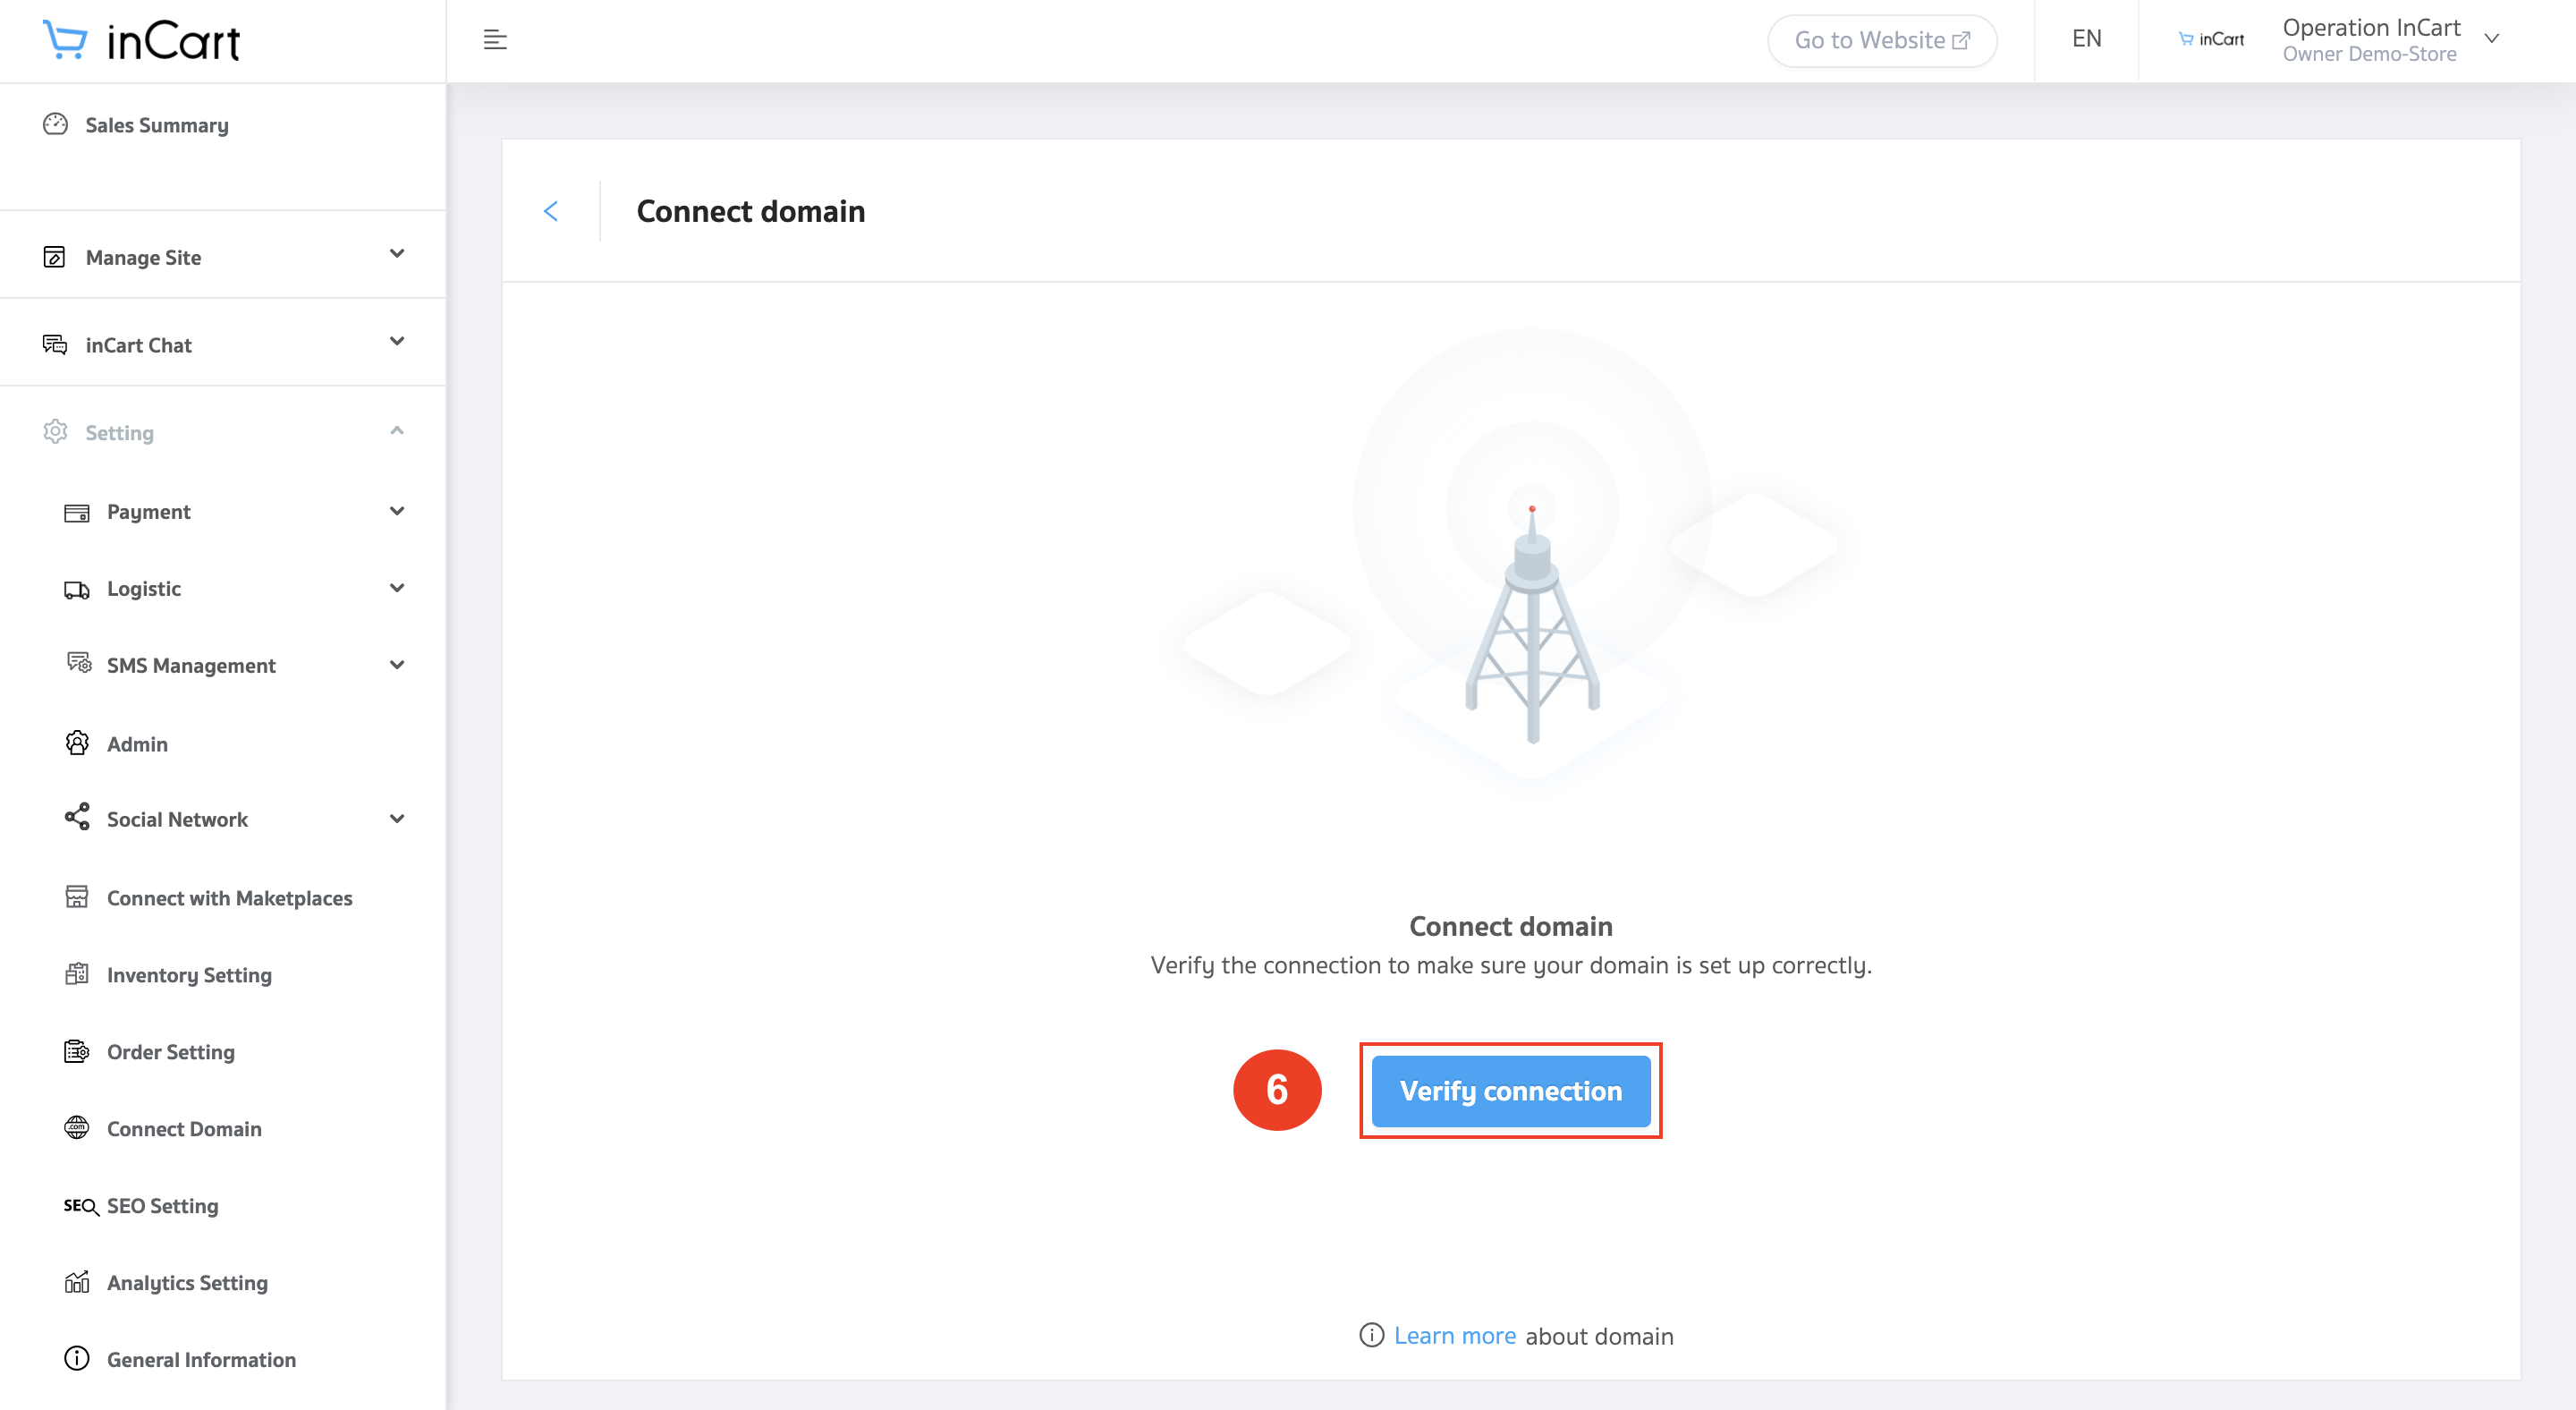
7. And then going to click on Verify the connection to make sure your domain is set up correctly.

8. Verify connection

When the test connect your Domain Name Success on-page will showing a message Pop-Up that “Connect Succeed”
And Your Domain Name It’s Working.